I was staring at a sticky, clouded mess on my kitchen counter, wondering why my first attempt at a coaster looked more like a science experiment gone wrong than a piece of art. Most people will tell you that you need a professional studio and a mountain of expensive equipment to get started, but that’s a total myth. In reality, the secret to successful resin crafts for beginners isn’t about how much you spend; it’s about mastering the psychology of patience and understanding the chemistry of your materials. I learned the hard way that rushing the process is the quickest way to turn a creative outlet into a source of stress.
In this guide, I’m stripping away the fluff and the intimidating jargon to give you a clear, actionable roadmap. I won’t overwhelm you with a massive shopping list; instead, I’ll show you how to focus on the essential tools that actually let you start creating with intentionality and flow. We’re going to cover everything from prepping your workspace to avoiding those frustrating air bubbles, ensuring your journey into resin is productive, relaxing, and—most importantly—actually fun.
Table of Contents
- Step-by-Step Instructions
- Curating Your Space With Essential Resin Art Supplies
- Protecting Your Creative Flow Through Vital Safety Precautions
- Mastering the Flow: 5 Mindful Tips for Your First Resin Project
- Finding Your Rhythm with Resin
- Finding Your Flow in the Pour
- Finding Your Flow in the Resin Process
- Frequently Asked Questions
Guide Overview
Tools & Supplies
- Silicone molds for shaping the resin
- Mixing cups for combining resin and hardener
- Wooden stir sticks for blending materials
- Heat gun or lighter to remove surface bubbles
- Protective gloves to prevent skin contact
- Epoxy resin kit (2-part liquid)
- Pigments or dyes (liquid or powder)
- Glitter or dried flowers for decoration
- Sandpaper for smoothing edges
Step-by-Step Instructions
- 1. Before you even touch a bottle of resin, you need to curate your workspace. Since I’m a bit of a perfectionist when it comes to my environment, I can’t stress enough how important a clean, well-ventilated area is. Lay down some silicone mats or even just some old parchment paper to catch those inevitable drips, and make sure you have a dedicated spot where you won’t be interrupted for a few hours.
- 2. Safety isn’t just a suggestion; it’s your foundation for a stress-free session. I always keep a small “safety kit” nearby, which includes nitrile gloves and a high-quality respirator mask. Resin chemicals can be tricky, and you’ll feel much more grounded and focused if you know you’re protecting your health while you create.
- 3. Now, let’s talk about the actual mixing, which is where the psychology of patience really kicks in. Measure your resin and hardener with extreme precision using small graduated cups; even a tiny error in the ratio can leave your project tacky or unfinished. Once measured, stir them together slowly and deliberately, making sure to scrape the sides and bottom of the cup to ensure a perfectly even blend.
- 4. Once your mixture is clear and bubble-free, it’s time to introduce your intentional elements. Whether you’re adding dried flowers, glitter, or pigments, I find that working in small batches prevents the resin from curing too quickly before you’ve finished your design. Think of this as the “flow state” portion of your craft—take your time to place each piece exactly where you want it to live.
- 5. Pour your mixture into your chosen molds, but do it with a gentle touch to avoid trapping air. If you see tiny bubbles rising to the surface, don’t panic; just use a long-reach lighter or a heat gun to lightly pass over the surface. This quick burst of heat pops the bubbles instantly, leaving you with that crystal-clear finish we’re all striving for.
- 6. The hardest part for any productivity enthusiast is the “waiting game.” Your resin needs time to cure, which can take anywhere from 24 to 72 hours depending on the brand. I actually use this time to practice mindfulness or tackle my bullet journal; resist the urge to poke or move the molds prematurely, as interrupting the chemical process can ruin the structural integrity of your piece.
- 7. Finally, once the resin is completely hard and no longer feels warm to the touch, carefully demold your creation. If the edges feel a little sharp, you can use a fine-grit sandpaper to smooth them out gently. Take a moment to step back and appreciate what you’ve made—it’s not just a craft; it’s a tangible result of your focus and creativity.
Curating Your Space With Essential Resin Art Supplies
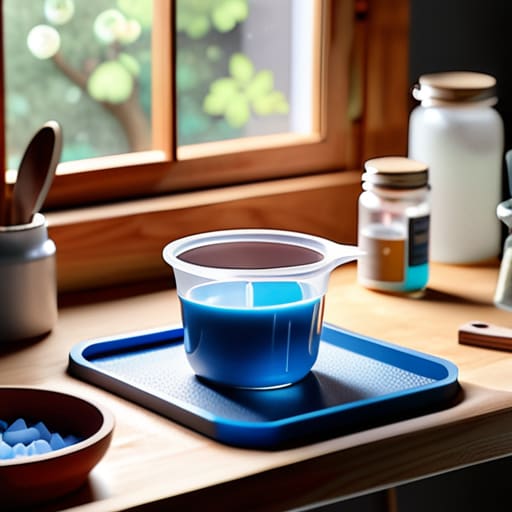
When I first started my creative journey, I made the mistake of thinking a massive haul of glitter and pigments would make me an artist overnight. In reality, I found that my most successful projects came from having a dedicated, organized station. Before you dive in, I highly recommend focusing on the essential resin art supplies that actually facilitate a smooth workflow. You’ll need a level surface—this is non-negotiable if you want your pieces to cure evenly—and a few high-quality silicone molds. I personally love using resin molds for beginners that have slightly deeper walls; they give you more room to play with layering without the anxiety of overflow.
Beyond the aesthetics, we have to talk about the psychological peace of mind that comes from being prepared. Nothing kills my creative flow faster than a mid-project scramble for supplies. Set up a “safety zone” with proper ventilation and gloves; taking these safety precautions for working with epoxy isn’t just about health, it’s about removing the mental friction that prevents you from truly getting into a state of flow. When your space is prepared, your mind is free to create.
Protecting Your Creative Flow Through Vital Safety Precautions
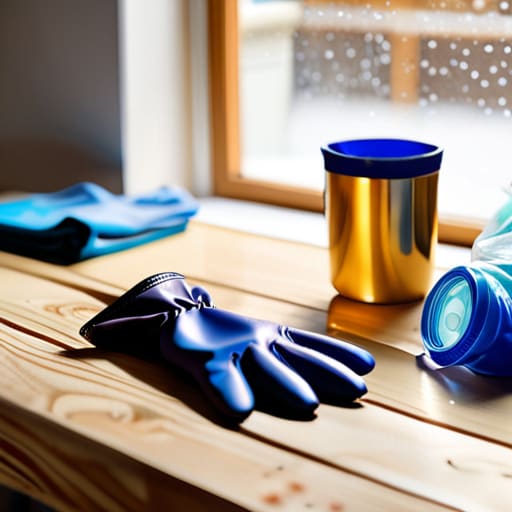
When I first started experimenting with resin, I thought I could just dive in and let the creativity take over. But I quickly learned that true flow requires a foundation of safety; you can’t be in the zone if you’re worrying about fumes or skin irritation. Before you even touch your first batch, please make sure you have a well-ventilated workspace. I always keep a window cracked or a small fan running to keep the air moving. Investing in a good respirator and nitrile gloves isn’t just a suggestion—it’s a non-negotiable part of your safety precautions for working with epoxy.
Think of your safety setup as a way to protect your mental space as much as your physical health. If you’re constantly glancing nervously at your workspace, you’re breaking your own concentration. I like to set up my station with everything I need—gloves, masks, and even a timer to track the curing time for epoxy resin—all within arm’s reach. By treating these steps as a ritual rather than a chore, you create a secure environment where your only focus is the beautiful art unfolding in front of you.
Mastering the Flow: 5 Mindful Tips for Your First Resin Project
- Don’t rush the mix. I know how tempting it is to jump straight into the pour, but spending those extra few minutes ensuring your resin and hardener are perfectly integrated is the difference between a crystal-clear masterpiece and a sticky, unfinished mess.
- Embrace the “imperfection” of your first few tries. In my psychology studies, I learned how much pressure we put on ourselves to be perfect immediately; instead, treat your first few pours as low-stakes experiments to learn how the liquid behaves.
- Control your environment to protect your focus. Resin is sensitive to everything from dust motes to temperature shifts, so create a dedicated, stable little “nook” where you won’t be interrupted by pets, kids, or sudden drafts.
- Work with the bubbles, not against them. Instead of panicking when you see tiny air pockets, use a heat gun or a toothpick with intention; it’s a great moment to slow down and practice that mindfulness I’m always preaching.
- Plan your pours around your energy levels. Resin work requires a certain level of precision and patience, so save your most intricate designs for those windows in your day when you feel most mentally present and calm.
Finding Your Rhythm with Resin
Focus on the process rather than the perfection; resin is unpredictable, and learning to flow with its unique timing is where the real magic—and mindfulness—happens.
Master your environment by keeping your essential supplies organized and your safety gear non-negotiable, ensuring your creative energy isn’t drained by avoidable chaos.
Start small to avoid overwhelm, choosing one simple project that allows you to understand how the medium behaves before you dive into complex, multi-layered designs.
Finding Your Flow in the Pour
“Don’t let the technicalities of mixing and pouring intimidate you; instead, view resin as a medium for mindfulness—a way to slow down, focus on the present moment, and turn a chaotic schedule into a tangible piece of intentional art.”
Ella Thompson
Finding Your Flow in the Resin Process
As you wrap up your first foray into the world of resin, remember that the journey is just as important as the finished piece sitting on your desk. We’ve covered the essentials, from gathering your core supplies to setting up a dedicated workspace and, most importantly, prioritizing your safety to keep that creative spark alive. It’s easy to get caught up in the technicalities of ratios and curing times, but don’t let the logistics overshadow the joy of creation. The goal isn’t to achieve immediate perfection; it’s about mastering the rhythm of the process and learning how to navigate the beautiful unpredictability that comes with working such a fluid medium.
At the end of the day, I want you to view resin crafting not as another item on your endless to-do list, but as a way to reclaim your time and focus. In my own practice, I’ve found that leaning into a tactile, hands-on hobby is one of the most effective ways to practice mindfulness and break free from digital burnout. Let these crafts be your sanctuary—a place where you can slow down, breathe, and focus on doing what truly matters. Whether your first pour is a masterpiece or a messy learning experience, embrace it. You aren’t just making art; you are building a habit of intentionality.
Frequently Asked Questions
How can I tell if my resin is curing properly or if I've messed up the mixing ratio?
It’s so easy to panic when your project feels “off,” but don’t beat yourself up—we’ve all been there. If your resin stays tacky after 24–48 hours or feels strangely soft, you likely had a mixing ratio mishap. A quick way to check is the “finger test” once it should be hard; if it’s gummy, the chemistry is unbalanced. If it’s just cloudy, it might just need more time or a heat gun!
Is there a way to prevent those tiny, annoying air bubbles from ruining my finished piece?
Oh, the dreaded bubbles! I remember my first few projects; I felt so defeated seeing those tiny silver spheres trapped in my work. To keep your flow smooth, try warming your resin slightly in a warm water bath before mixing—it thins the viscosity so bubbles can escape more easily. Also, pour your resin in a very thin, slow stream. Think of it as a mindful ritual: slow, intentional movements lead to much clearer results.
How do I know which type of resin is best for a specific project, like jewelry versus a coaster?
Think of it like choosing the right tool for the job—you wouldn’t use a sledgehammer to hang a picture frame, right? For jewelry, you want a “low-viscosity” epoxy; it’s thin and flows easily, which helps prevent those pesky tiny bubbles from getting trapped in delicate molds. However, for coasters, I recommend a thicker, UV-resistant resin. It’s more durable for daily use and stays crystal clear, even when sitting in a sunny window.
