I was standing in the middle of my living room last Saturday, staring at a half-finished wall and a literal puddle of “eggshell white” on my hardwood floor, feeling completely defeated. I had approached the project like I approach my chaotic Monday mornings—trying to rush through the prep work just to get to the “fun” part. But as I sat there, watching the sand trickle through one of my vintage hourglasses to calm my nerves, it hit me: I was treating my home like a checklist rather than a space. Most people think learning how to paint a room is just about picking a pretty color and slapping it on the drywall, but that’s a recipe for burnout and uneven coats.
In this guide, I’m stripping away the overwhelming DIY fluff to give you a psychology-backed approach to home improvement. We aren’t just talking about brushes and rollers; we are talking about setting yourself up for a flow state. I’ll walk you through the intentional preparation, the essential toolkits, and the pacing strategies you need to ensure your project feels deeply rewarding rather than just another chore on your endless to-do list.
Table of Contents
- Step-by-Step Instructions
- Curating Your Essential Painting Supplies List
- Mastering How to Prep Walls for Painting
- Small Shifts for a Seamless Finish: My Top 5 Pro-Tips
- Small Wins for a Stress-Free Transformation
- The Psychology of the Palette
- The Final Stroke: More Than Just a Color Change
- Frequently Asked Questions
Guide Overview
Tools & Supplies
- Paint roller and tray for large surfaces
- Angled brush for edges and corners
- Painter's tape for clean lines
- Drop cloths to protect flooring
- Interior paint 1-2 gallons per room
- Painter's tape 1 roll
- Sandpaper fine grit for smoothing walls
- Spackle small container for hole repair
Step-by-Step Instructions
- 1. First, we need to clear the mental and physical clutter. I always tell my clients that you can’t focus on a new project if you’re tripping over old baggage, so start by moving your furniture to the center of the room and covering it with plastic sheets. Don’t forget to remove any outlet covers or switch plates; it’s these tiny, intentional details that prevent a messy finish later on.
- 2. Next, let’s talk about the prep work, which is where most people try to cut corners. Grab a damp cloth and wipe down your walls to remove dust and cobwebs, because paint simply won’t adhere to a dirty surface. If you have any small nicks or dents in the drywall, use a bit of spackle to fill them in, and once it’s dry, sand it smooth so your wall looks like a fresh canvas.
- 3. Now, it’s time to protect your boundaries—specifically the edges of your room. Apply painter’s tape along the baseboards, ceiling line, and window frames, pressing it down firmly with your finger to ensure there are no gaps. I find that taking an extra minute to ensure a tight seal is the best way to avoid the stress of having to fix messy lines once the fun part begins.
- 4. Once your space is prepped, grab your brush and start “cutting in.” This means painting a two-inch border around the edges, corners, and trim where a roller just can’t reach. I like to work in small sections to keep the paint from drying too quickly, which helps you maintain a consistent texture across the entire perimeter.
- 5. Now for the main event: rolling on the color. Dip your roller into the tray, ensuring it’s evenly coated but not dripping, and work in a “W” or “M” pattern to distribute the paint across the wall. This technique helps you avoid those dreaded streaks and ensures the coverage is deep and even, much like how we try to distribute our energy throughout a busy workday.
- 6. Patience is a virtue, especially when it comes to the second coat. I know it’s tempting to jump right back in, but you really must let the first layer dry completely according to the can’s instructions. Applying a second coat is what truly transforms the color from a streaky mess into a rich, professional-looking finish that brings your vision to life.
- 7. Finally, as the paint dries, you can begin the rewarding process of “unveiling” your work. Carefully peel off your painter’s tape while the paint is still slightly tacky to prevent it from chipping. Once everything is dry, put your furniture back and take a moment to just breathe and admire the space you’ve created; you didn’t just change a color, you shifted the energy of your environment.
Curating Your Essential Painting Supplies List
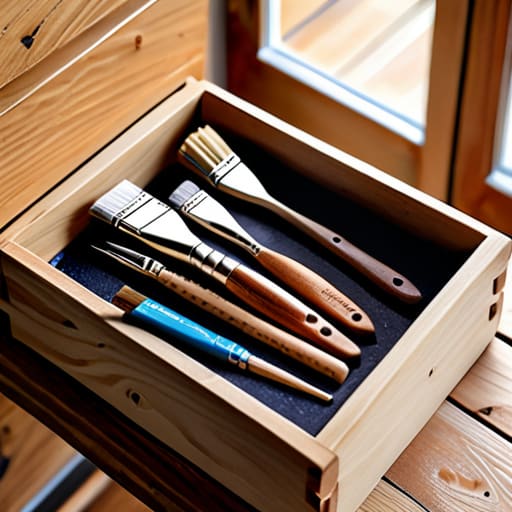
Before you dive into the actual application, I want you to take a breath and look at your toolkit. I’ve learned through my own weekend projects that a disorganized workspace leads to a disorganized mind—and a messy room. Creating a solid essential painting supplies list isn’t just about checking boxes; it’s about setting yourself up for a flow state where you aren’t constantly pausing to hunt for a lost screwdriver or a clean rag. I always keep my tools organized in a dedicated bin, much like how I structure my bullet journal, so everything is within reach when the inspiration strikes.
Don’t overlook the “unsexy” parts of the process, either. While everyone wants to talk about picking the best paint for interior walls, the real magic happens in the preparation. I can’t stress enough how important protecting furniture while painting is to your mental peace. There is nothing more soul-crushing than finishing a beautiful job only to realize you’ve left a stray droplet on your favorite velvet armchair. Invest in high-quality drop cloths and painter’s tape; the extra few dollars spent upfront will save you hours of stress and cleanup later.
Mastering How to Prep Walls for Painting

I often tell my clients that the most important part of any project isn’t the execution, but the foundation you build beforehand. When it comes to how to prep walls for painting, it’s easy to feel like you’re just delaying the “fun” part, but rushing this stage is where most people lose their momentum. I like to think of prep work as a form of mindfulness; it’s about clearing the mental and physical clutter so you can focus entirely on the transformation. Start by cleaning your walls with a damp cloth to remove dust and oils. If you skip this, even the best paint for interior walls won’t adhere properly, and you’ll find yourself fighting streaks later on.
Next, don’t underestimate the power of a good sanding session. Taking a few minutes to smooth out imperfections ensures a professional finish that lasts. While you’re at it, make sure you are protecting furniture while painting by moving heavy pieces to the center of the room and covering everything with drop cloths. It might feel tedious, but creating this controlled environment allows you to work with a sense of calm rather than chaos.
Small Shifts for a Seamless Finish: My Top 5 Pro-Tips
- Don’t underestimate the power of “cutting in” first; I’ve learned that taking that extra ten minutes to carefully paint the edges and corners before hitting the large surfaces with a roller prevents those stressful, messy overlaps later on.
- Embrace the “two-coat rule” even if you’re tempted to rush; my psychology background tells me that skipping a coat is just a recipe for future frustration, and waiting for that second layer ensures the color truly reflects your intention.
- Treat your lighting like a tool, not an afterthought; I always make sure to check my progress under both natural daylight and my warm indoor lamps, because a color that looks dreamy at noon might feel surprisingly heavy once the sun goes down.
- Practice mindful movement with your roller to avoid fatigue; instead of frantic, short strokes, try using long, even, “W” shaped motions to distribute the paint—it keeps your rhythm steady and prevents those annoying texture streaks.
- Curate a “reset station” for your tools; I keep a damp cloth and some painter’s tape handy so that if I need to step away for a mental break or a quick coffee, I can tidy up immediately rather than letting the paint dry and turn a simple task into a chore.
Small Wins for a Stress-Free Transformation
Don’t let the scale of the project overwhelm you; treat each stage—from prepping the surfaces to the final stroke—as a separate, manageable win to keep your momentum steady.
Remember that the “boring” work, like cleaning and taping, is actually where the magic happens; investing time in the prep phase prevents the mental fatigue of fixing mistakes later.
Use this process as a mindfulness exercise rather than a chore, allowing yourself to find a rhythm in the repetitive motions to turn a home improvement task into a moment of creative clarity.
The Psychology of the Palette
“When we choose a color for our space, we aren’t just picking a pigment; we are intentionally designing the emotional backdrop for our future selves. Don’t just paint a room—curate an environment that supports the person you are striving to become.”
Ella Thompson
The Final Stroke: More Than Just a Color Change
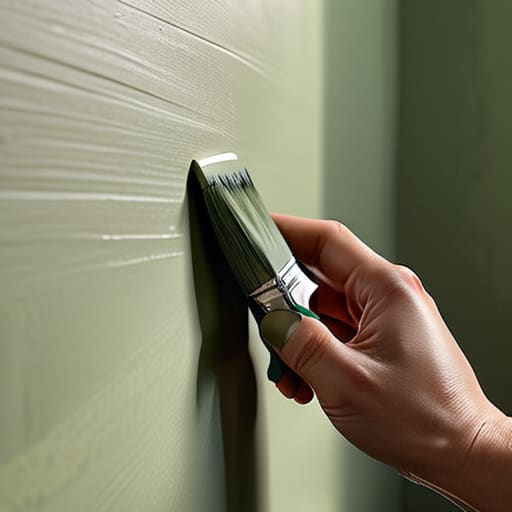
As you step back to survey your handiwork, take a second to appreciate the process you just navigated. From curating that perfect supply list to the seemingly tedious task of prepping your walls, every single step was a building block toward a better result. Remember, the secret isn’t in the speed of the brushstroke, but in the intentionality of your preparation. By focusing on the details—the sanding, the taping, and the careful selection of your palette—you’ve ensured that the final layer of color isn’t just a temporary fix, but a lasting transformation of your environment.
At the end of the day, painting a room is about so much more than just changing a wall color; it’s about reclaiming your space and setting the stage for how you want to feel within it. I often find that when my physical surroundings are in harmony, my mental clarity follows suit. Don’t let the exhaustion of the project overshadow the achievement. You haven’t just applied paint; you have cultivated a sanctuary that reflects your unique rhythm and energy. Now, grab a cup of tea, sit in your newly transformed room, and breathe in the peace you worked so hard to create.
Frequently Asked Questions
How do I figure out exactly how much paint I actually need so I don't end up with five extra gallons or, even worse, running out mid-wall?
There’s nothing quite as soul-crushing as being halfway through a fresh coat and realizing you’re staring at a dry tray. To avoid that mid-wall panic, grab a measuring tape and calculate your total wall area (height x width), then subtract the space for windows and doors. A good rule of thumb? One gallon typically covers about 350 to 400 square feet. Always aim for two coats to get that professional finish, and maybe grab one extra quart just for peace of mind.
I’m worried about the smell—are there specific low-VOC or eco-friendly options that won't give me a headache while I'm working?
I completely hear you—nothing kills your creative flow like a pounding headache from harsh fumes. Since I focus so much on creating a mindful workspace, I always prioritize air quality. Definitely look for labels marked “Low-VOC” or “Zero-VOC.” These have much lower levels of volatile organic compounds, meaning fewer odors and a much gentler impact on your environment. It’s a small intentional choice that makes the whole process feel so much more peaceful.
How can I tell if my chosen color is actually going to look good in my specific lighting, or if it's going to look completely different once the sun goes down?
This is where the psychology of space meets reality! I always tell my clients: never trust a tiny swatch in a brightly lit store. To avoid “color regret,” grab sample pots and paint large squares on different walls. Observe them at noon, at sunset, and under your lamps at night. Lighting completely shifts a pigment’s undertones. It’s about intentionality—seeing how the color actually lives in your rhythm before you commit.
