I was standing in my living room last Saturday, surrounded by a chaotic pile of frames and a half-empty coffee mug, staring at a single, crooked canvas that seemed to be mocking my sense of order. We often think that learning how to hang a picture is just a simple matter of grabbing a hammer and hoping for the best, but that’s a recipe for a cluttered mind and a ruined wall. In reality, the way we curate our visual environment is a direct reflection of how we manage our mental energy; if your walls feel disjointed and frantic, your space will never truly feel like a sanctuary.
In this guide, I’m stripping away the overwhelming DIY jargon to give you a streamlined, intentional approach to decorating. I’ll walk you through the psychological importance of visual flow and provide the practical, step-by-step mechanics you need to ensure every piece sits exactly where it belongs. We aren’t just talking about nails and levelers here; we are learning how to create intention in your home so that your surroundings finally support the calm, productive life you’re working so hard to build.
Table of Contents
- Step-by-Step Instructions
- Curating Your Vision Gallery Wall Layout Ideas
- Choosing Your Tools a Picture Hanging Hardware Guide
- Mindful Mounting: 5 Ways to Hang Art with Intention
- Finding Your Rhythm: Three Final Thoughts on Intentional Decorating
- The Psychology of Your Space
- Final Touches: Making Your Space Truly Yours
- Frequently Asked Questions
Guide Overview
Tools & Supplies
- Hammer for driving nails or hooks
- Measuring tape for spacing and height
- Pencil for marking wall positions
- Level to ensure the frame is straight
- Picture hanging hardware (nails, hooks, or anchors) 1 pack
- Picture frame 1 unit
Step-by-Step Instructions
- 1. Before you even touch a hammer, I want you to grab your favorite notebook—maybe even your bullet journal—and visualize the flow of the room. Instead of just picking a spot that feels “empty,” consider how the art will interact with the light and the movement of people passing by. We aren’t just filling gaps; we are curating an experience for our eyes.
- 2. Once you’ve settled on a location, it’s time to measure twice and drill once. I always recommend using a measuring tape to find the center point of your intended space, then calculating the height. A good rule of thumb I swear by is the “eye-level rule,” which means the center of the piece should sit roughly 57 to 60 inches from the floor. This prevents that awkward feeling of your art “floating” too high above your furniture.
- 3. Now, let’s talk about the hardware. Depending on the weight of your piece, you’ll need to choose between a simple nail, a heavy-duty screw, or perhaps a command strip if you’re living in a rental. I like to think of this as matching the energy of the object to its support; a heavy, vintage wooden frame deserves more than just a flimsy thumbtack to keep it secure and steady.
- 4. To ensure your marks are precise, use a pencil to lightly indicate exactly where the hardware will go. If you’re working with a wire hanger on the back of the frame, don’t just aim for the top of the frame—pull the wire taut toward the top and measure the distance from the wire to the top edge of the frame. This little bit of math prevents that frustrating moment when the picture sits much lower than you originally planned.
- 5. As you begin to drive the nail or screw into the wall, try to do it mindfully. I often keep one of my vintage hourglasses on my desk to remind me that these small, domestic tasks are part of my larger rhythm of life. Take a breath, steady your hand, and focus on the sensation of the tool meeting the wall; it turns a chore into a moment of intentional presence.
- 6. Once the hardware is in place, carefully lift your artwork and guide it onto the hook. Don’t step away immediately! Instead, stand back and look at it from different angles. Check if it’s level, and if it’s slightly tilted, use a small piece of adhesive putty or a tiny spacer behind the bottom corner to perfect the balance.
- 7. Finally, take a moment to step away from the wall and just be with your creation. Look at how the light hits the texture of the frame and how it changes the mood of the room. You haven’t just hung a piece of decor; you’ve successfully integrated a piece of your identity into your sanctuary.
Curating Your Vision Gallery Wall Layout Ideas
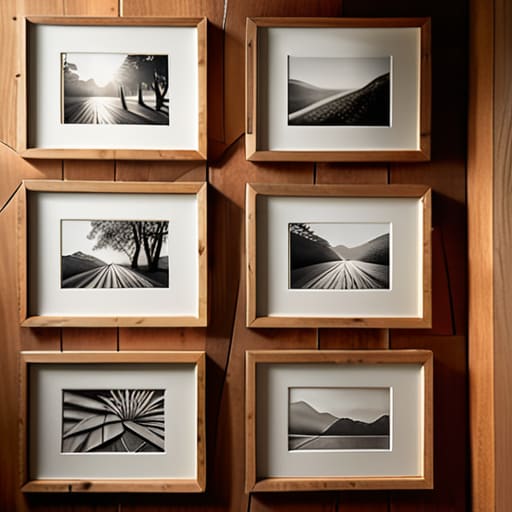
When I’m staring at a blank wall, I don’t just see empty space; I see an opportunity to tell a story. Creating a gallery wall can feel overwhelming, like you’re trying to solve a complex puzzle, but I find it helpful to approach it with a sense of intentionality. Instead of rushing to hammer anything into the wall, I love to experiment with different gallery wall layout ideas on the floor first. You might try a structured grid for a clean, minimalist look that calms the mind, or a more organic, asymmetrical arrangement that mirrors the beautiful chaos of real life.
The secret to making these layouts feel cohesive rather than cluttered is all in the rhythm of the spacing. I always suggest finding a “hero” piece—your largest or most meaningful item—to serve as your anchor. From there, you can build outward, keeping a consistent distance between frames to create a sense of visual flow. Before you commit to any permanent changes, remember that measuring height for wall art is crucial; you want your focal points to sit at eye level so they truly invite connection rather than just filling a gap.
Choosing Your Tools a Picture Hanging Hardware Guide

Before you grab that hammer, let’s talk about the psychology of preparation. I’ve found that much of our “productivity paralysis” when tackling home projects comes from a lack of the right tools. If you’re staring at a massive, ornate mirror or a heavy wooden frame, you can’t just wing it; hanging heavy frames on drywall requires specific anchors to ensure your hard work doesn’t end up in a heap on the floor. I always keep a small kit of various wall anchors and screws tucked away in my desk—think of it as your toolkit for intentional living.
For my fellow renters or those who prefer a low-impact approach, the debate of command strips vs nails is a classic one. While strips are a lifesaver for lightweight prints, they aren’t a universal fix. I always recommend checking the weight capacity of your adhesive before you commit. If you’re aiming for a more permanent, professional look, investing in a solid picture hanging hardware guide can save you from the frustration of crooked lines and wasted effort. Remember, the goal is to create a space that feels stable and serene, not one you’re constantly fixing.
Mindful Mounting: 5 Ways to Hang Art with Intention
- Eye Level is the Psychological Sweet Spot: We often hang things too high because we’re rushing, but I’ve learned that placing art at roughly 57 to 60 inches from the floor aligns with our natural line of sight, creating a sense of calm and connection rather than visual tension.
- Test the Energy Before the Hammer: Before you commit to a single nail, trace your frame on a piece of kraft paper and tape it to the wall; this allows you to step back and feel if the placement truly resonates with the room’s flow without the stress of accidental holes.
- Respect the Negative Space: It’s tempting to fill every empty corner, but remember my manifesto—productivity (and decor!) is about what truly matters. Leave enough “breathing room” around your pieces so your eyes can rest and your favorite art can actually speak to you.
- Use the “Paper Template” Trick for Complexity: If you’re working with a multi-piece arrangement, mark the hanging points on paper cutouts first; this eliminates that frantic, last-minute decision fatigue that often leads to crooked frames and unnecessary clutter.
- Anchor Your Space with Lighting: A picture isn’t just an object; it’s a focal point. Consider how natural light hits the frame throughout the day to ensure your chosen piece doesn’t just sit there, but actively enhances the mood of your sanctuary.
Finding Your Rhythm: Three Final Thoughts on Intentional Decorating
Remember that your home should reflect your inner calm, so don’t feel pressured to fill every empty patch of wall; sometimes, the most productive thing you can do for your space is to leave room for the eye to breathe.
Approach your hardware choices with the same mindfulness you use in your daily routine—investing a few extra minutes in the right tools now prevents the frustration of a crooked frame later.
Treat your gallery wall as a living project rather than a finished chore, allowing yourself the psychological freedom to evolve your layout as your life and your tastes shift over time.
The Psychology of Your Space
“Hanging a picture isn’t just about finding the right nail or level; it’s about the intentional act of deciding what deserves your gaze and how you want your environment to make you feel every time you walk through the door.”
Ella Thompson
Final Touches: Making Your Space Truly Yours
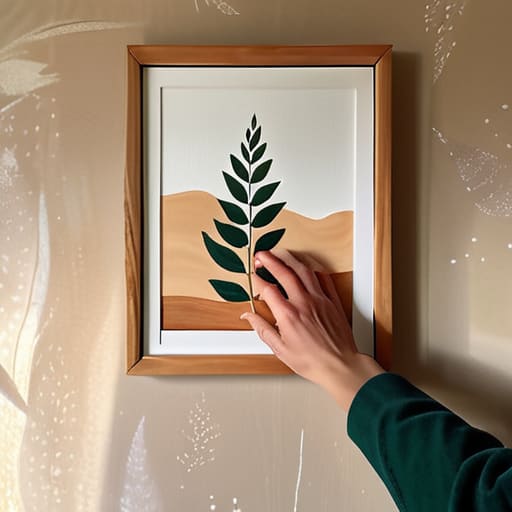
As you step back to survey your work, remember that hanging a picture is about much more than just finding the right nail or measuring the distance from the ceiling. We’ve covered the technical essentials—from selecting the perfect hardware for your specific wall type to sketching out those intentional gallery layouts that reflect your unique style. By taking the time to choose your tools wisely and plan your placement, you’ve moved beyond simple decoration and into the realm of intentional living. You aren’t just filling empty gaps on a wall; you are carefully constructing an environment that supports your mental well-being and reflects your journey.
At the end of the day, I want you to remember that your home should be a sanctuary that moves at your own rhythm. Don’t let the fear of a misplaced nail stop you from bringing beauty into your life; if a frame isn’t sitting quite right, just move it. Perfection is a myth that often leads to paralysis, but purposeful action leads to growth. Whether it’s a cherished family photo or a piece of art that sparks joy, let every piece you hang serve as a reminder of what truly matters to you. Now, take a deep breath, admire your progress, and enjoy the beautiful space you’ve created.
Frequently Asked Questions
How do I figure out the perfect height for a picture so it doesn't feel too high or too low in the room?
The “eye-level” rule is my go-to, but let’s make it more intentional. A common mistake is hanging art too high, which creates a visual disconnect. Aim for the center of the piece to be about 57 to 60 inches from the floor. This mimics a gallery setting and feels most natural to our gaze. If you’re hanging something above a sofa, leave about 6 to 8 inches of breathing room to keep the composition grounded.
What's the best way to hang heavy or oversized frames without worrying about them damaging my walls?
When it comes to those heavy, statement pieces, I always tell my clients: don’t let the fear of a wall crack paralyze your design vision. To keep things stress-free, skip the tiny nails and invest in heavy-duty wall anchors or professional picture hooks rated for specific weight capacities. If you’re feeling extra cautious, using a French cleat is a total game-changer—it distributes the weight evenly, giving you that perfect, secure placement every single time.
I'm working with rental-friendly options; are there any reliable ways to hang art without using nails or screws?
Living in a rental can feel like you’re constantly negotiating with your walls, but don’t let that stifle your creativity. I’ve found that Command strips are a total lifesaver for lightweight frames, but if you’re hanging something a bit heavier, look into adhesive mounting putty or tension rods for nook spaces. Just remember: the psychology of a home is in the details, so choose methods that protect your space while still letting your personality shine.
